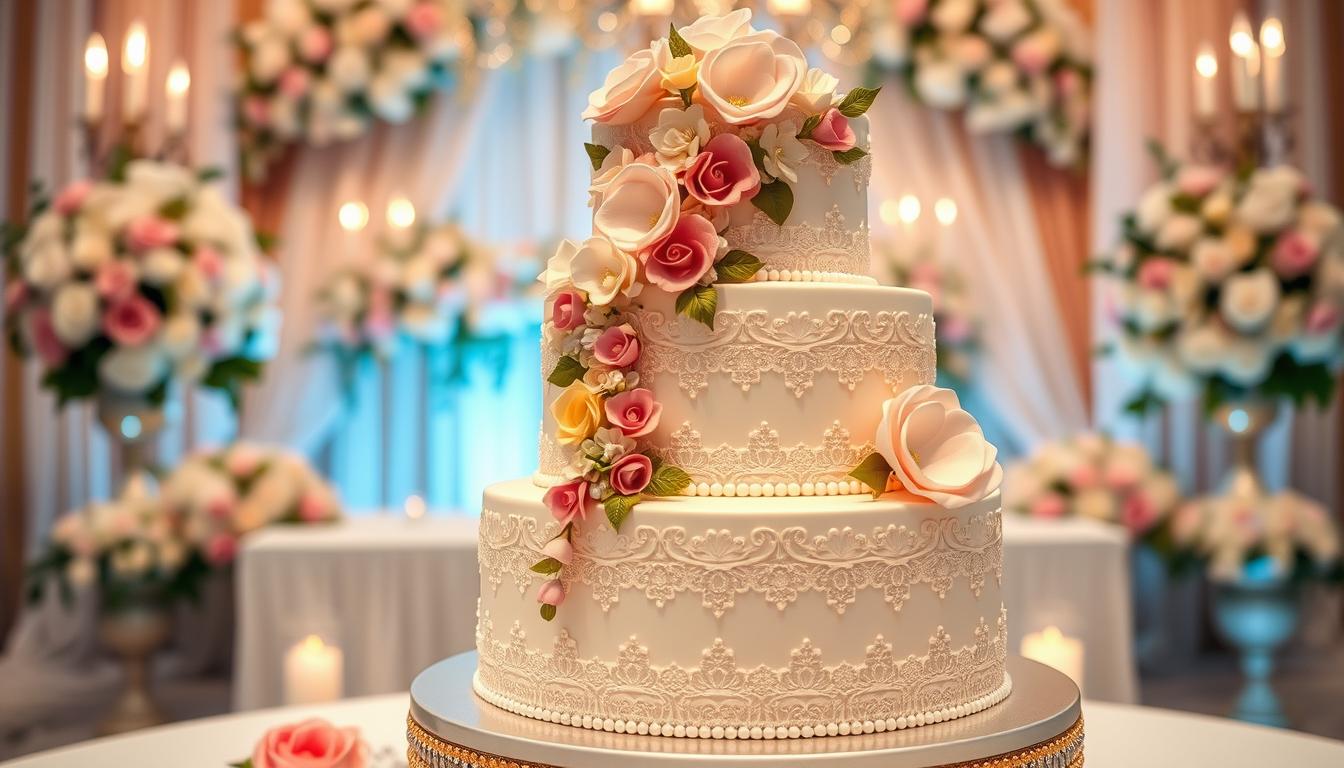
Making a beautiful 3 tier cake needs skill, creativity, and precision. It’s perfect for weddings or any big celebration. To get it right, you need to know the basics and practice a lot.
Starting your cake-making journey is exciting. Each tier is a chance to show off your cooking and design skills. Choosing the right ingredients and decorating techniques are key to a great cake.
Experts say to bake cake layers a day before. This makes putting the cake together and decorating easier. It also lets you focus on the details of your design.
Table of Contents
Essential Tools and Equipment for 3 Tier Cake Creation
Making a stunning 3 tier cake needs more than baking skills. You need the right tools and equipment to make your cake design come to life. Professional bakers know that quality tools are key to making amazing desserts.
Getting the right equipment can turn your cake-making into a pro-level activity. Here’s a checklist of the essential tools you’ll need for a magnificent multi-tiered cake.
Baking Equipment Checklist
- Professional cake pans in various sizes
- Digital kitchen scale for precise measurements
- Cake leveler with measurement markings
- Fat Daddio’s high-quality baking pans
- Parchment paper for easy cake removal
Decorating Tools and Supplies
Your cake design needs the right decorating tools. Here’s a detailed toolkit to take your pastry architecture to the next level:
| Tool | Price Range | Key Features |
|---|---|---|
| Kootek Decorating Kit | $10 | 42 pieces, 36 standard piping tips |
| Professional Piping Tip Set | $41 | 48 standard + 4 large tips |
| Cake Turntable | $50 | Smooth ball-bearing rotation |
Storage and Transportation Equipment
Keeping your cake safe needs special tools:
- Sturdy cake boards
- Cake lifters with supportive designs
- Acrylic cake disks for stable stacking
- Dowels for structural support
Remember, the right tools are an investment in your cake design skills.
Pro tip: Quality equipment doesn’t just make your work easier—it elevates the entire cake creation process.
Understanding Cake Pan Sizes and Batter Quantities
Choosing the right cake pan is key to a perfect tiered dessert. It’s important to know about pan sizes and how much batter you need. Success comes from picking the right pan size and the right amount of batter for each layer.
Cake pans come in various standard sizes, affecting your cake design. Here are the most common sizes:
- Round pans: 8 or 9 inches in diameter
- Square pans: 8 or 9 inches wide
- Rectangle sheet pans: 9×13 or 11×15 inches
- Loaf pans: 9×5 inches
*Pro tip: Most cake pans are typically 1.5 to 2 inches tall, which is ideal for creating consistent layers.*
When making batter for your tiered dessert, keep these tips in mind:
- Use about 16 ounces of batter per pan
- Use a kitchen scale for exact batter division
- Fill pans halfway to ensure even baking
| Pan Type | Typical Capacity | Recommended Batter |
|---|---|---|
| 8-inch Round Pan | 100 cubic inches | 16 ounces |
| 9-inch Square Pan | 128 cubic inches | 20 ounces |
| 13×9 Sheet Pan | 234 cubic inches | 36 ounces |
Remember, consistent layer height is crucial for a professional-looking tiered dessert. Always measure your batter carefully and adjust recipes as needed for different pan sizes.
Foundation Recipes for Perfect Cake Layers
Creating a stunning 3 tier cake starts with mastering foundational cake recipes. The right base makes your cake stand tall and taste amazing. Professional bakers know that quality ingredients and precise techniques are key for building great cake layers.
When preparing your 3 tier cake, understanding core recipes is essential. These foundational formulas help you make cakes that are delicious and sturdy.
Classic Vanilla Cake Recipe
Your perfect vanilla cake begins with top-notch ingredients:
- 3 cups (375 g) all-purpose flour
- 2½ teaspoons baking powder
- ½ teaspoon kosher salt
- 2 sticks (226 g) unsalted butter, room temperature
- 1½ cups (300 g) granulated sugar
- 4 large eggs
- ½ tablespoon vanilla bean paste
- 1 cup (240 ml) buttermilk
« The secret to an incredible layered confection is using room temperature ingredients for seamless mixing. »
Rich Chocolate Cake Base
For chocolate lovers, this robust recipe delivers deep flavor:
- 1.5 cups (130g) cocoa powder
- 1.5 cups (341g) unsalted butter
- 3.5 cups (675g) total sugar
- 6 eggs
Sturdy Buttermilk Cake Formula
Baking parameters for your cake layers:
| Parameter | Details |
|---|---|
| Baking Temperature | 350°F (175°C) |
| Baking Time | 25-27 minutes |
| Resting Time | 3 minutes in pan |
Remember to let your cakes cool completely before assembling your 3 tier cake. With these foundational recipes, you’ll create a spectacular layered confection that impresses every time.
Professional Frosting Techniques and Recipes
Mastering buttercream frosting is an art that turns simple cakes into stunning works. It’s a skill that 70% of successful cake decorators rely on. Knowing how to frost is key for any baker.

When making buttercream frosting, being precise is essential. The right consistency is crucial for your cake’s look. Here are some techniques to improve your frosting skills:
- Use cane sugar for smoother buttercream
- Mix powdered sugar in quarter-cup increments
- Aim for soft peaks when pulling your spatula out
« A perfectly frosted cake is the canvas of a true baker’s creativity. »
Professional bakers share some important steps for perfect buttercream frosting:
- Cool cakes completely before frosting
- Implement a crumb coat to lock in cake fragments
- Consider freezing cakes briefly to stabilize layers
Storing buttercream frosting is also important. You can keep it at room temperature for up to 3 days. Refrigerate it for a week or freeze for 3 months. When freezing, move it to the fridge a day before using for the best texture.
For an 8-inch cake, double your buttercream frosting recipe. This ensures your cake is fully covered. Each batch makes about 3 cups, ideal for smooth, professional cake decorations.
Structural Support and Stacking Methods for 3 Tier Cake
Making a stunning tiered dessert is more than just baking. It’s about building a structure that keeps your cake stable and beautiful. This is key for any event.
Knowing how to support your cake is essential for a pro multi-tiered cake. The method you use to stack can greatly affect your cake’s look and stability.
Doweling Techniques for Stability
Doweling is a key to a stable tiered dessert. Experts suggest these tips for supporting your cake layers:
- Use cake dowels or large plastic straws for internal support
- Place at least 3-4 dowel rods per tier
- Arrange dowels in a circular pattern 2-3 inches apart
- Cut dowels precisely to match the tier’s height
Weight Distribution Principles
Getting the weight right is vital in pastry architecture. Each tier must hold the weight of the ones above without losing stability.
« A well-supported cake is a beautiful cake. » – Professional Pastry Chef
Tier Assembly Step-by-Step
- Prepare a sturdy base cake board
- Insert support dowels into each tier
- Use a central long dowel for additional stability
- Carefully stack tiers, ensuring even placement
- Apply buttercream or ganache between layers for extra support
Mastering these support techniques will make your tiered desserts look amazing and stay stable. The secret to a perfect multi-tier cake is in the prep and execution.
Creating Smooth and Even Cake Layers
Making perfect cake layers is key to a great layered dessert. It’s all about the techniques that turn simple baking into art. Professional bakers know that smooth layers are not just pretty. They are the strong base of a beautiful cake.

To get flawless cake layers, you need to prepare well and execute carefully. Here are the main steps for perfect layers:
- Use straight-edged cake pans for consistent results
- Distribute batter evenly (approximately 500 grams per pan)
- Level cake layers using a professional cake leveler
- Chill layers for 30-60 minutes before assembling
« The secret to a perfect cake is in the precision of its layers. » – Professional Pastry Chef
Getting the layers right is very important. Use a serrated knife or a cake leveler to even out the tops. This makes sure each layer is flat. Chilling the layers before putting them together helps them stay together and prevents them from breaking.
| Layer Preparation Technique | Recommended Method |
|---|---|
| Batter Distribution | Equal amounts per pan (500g) |
| Cooling Time | 30-60 minutes |
| Recommended Layers | 3-4 layers |
When you put your layers together, be precise. Place the top layer upside down for straight edges. Use a turntable to make sure the frosting and layers are even.
Advanced Decoration Techniques with Fondant
Fondant cake decoration turns simple cakes into stunning works of art. It takes skill, patience, and creativity to master fondant techniques. Professional decorators see fondant as a perfect canvas for their art.
Decorating cakes with fondant involves key steps to improve your baking. Learning these techniques will help you make cakes that amaze everyone.
Fondant Coverage Tips
- Make sure cake layers are level before adding fondant
- Use a smooth buttercream base for better fondant adhesion
- Knead fondant well to remove air bubbles
- Roll fondant to a 1/8-inch thickness for evenness
Creating Decorative Elements
Fondant decoration opens up a world of creativity. Making detailed designs needs precision and creativity. Royal icing is key for about 75% of advanced decorations, adding fine details.
| Fondant Technique | Difficulty Level | Time Investment |
|---|---|---|
| Basic Fondant Covering | Intermediate | 30-45 minutes |
| Sugar Flower Creation | Advanced | 1-2 hours |
| 3D Fondant Sculptures | Expert | 2-4 hours |
Handling and Storage
Proper storage keeps your fondant cake looking great. Keep decorated cakes in cool places, away from sunlight. Sugar flowers, a favorite decoration, can last forever with care.
Professional cake decorators know that patience and practice are the secret ingredients to perfect fondant work.
With hard work and skill, you can turn simple cakes into amazing edible art. These cakes will impress everyone.
Buttercream Mastery for Perfect Finishes
Buttercream frosting is key for amazing cake decoration. It can turn your cakes from simple to stunning. Learning buttercream techniques can boost your cake decoration skills.
Professional bakers see buttercream as an art form. It needs precision and practice for a flawless finish. Here are some tips to help:
- Use room temperature butter for smooth mixing
- Sift powdered sugar to prevent lumps
- Add cream gradually for perfect consistency
- Chill cake between frosting layers
Choosing the right ingredients is crucial for the best buttercream. Here’s a classic recipe:
| Ingredient | Quantity | Purpose |
|---|---|---|
| Real Butter | 1 cup | Creates creamy base |
| Powdered Sugar | 3 cups | Provides sweetness and structure |
| Vanilla Extract | 2 teaspoons | Adds flavor depth |
| Heavy Cream | 1-6 tablespoons | Adjusts consistency |
« Buttercream is the canvas where cake decoration comes to life. » – Professional Pastry Chef
Storing buttercream right is key to keeping it fresh. Proper refrigeration extends its usability. It can last up to a week in the fridge or three to four months in the freezer.
With practice, your buttercream will taste great and look amazing. Remember, cake decoration is an art that gets better with each try.
Working with Fresh Flowers and Edible Decorations
Adding fresh flowers to your cake design is an art. It turns a simple dessert into a beautiful masterpiece. You need to plan carefully and know what you’re doing.
Safe Flower Selection
Not all flowers are good for decorating cakes. Here’s what to look for:
- Choose only organic, pesticide-free flowers
- Make sure they are safe to eat
- Work with local florists who know what they’re doing
Edible Flower Varieties
Some flowers are safe for decorating cakes. Here are your best choices:
- Begonias
- Calendula
- Carnations
- Roses
Placement and Arrangement Strategies
Where you place flowers is key. Here are some tips from the pros:
| Cake Tier | Recommended Flower Quantity | Placement Strategy |
|---|---|---|
| 3-Tier Cake | 8-9 flowers | Cascading arrangement |
| 4-Tier Cake | 20+ flowers | Graduated size placement |
Food Safety Considerations
Keep your cake safe with these steps:
- Wrap flower stems with floral tape
- Put a plastic barrier between flowers and cake
- Decorate flowers on the same day
- Put them in the fridge right after
« Fresh flowers can transform a simple cake into an extraordinary culinary artwork. » – Professional Baker’s Insight
Pro tip: Dried flowers last longer and are a great choice for decorating cakes.
Temperature Control and Storage Guidelines
Creating a stunning cake design is more than just baking. It’s about managing temperature right. This keeps your cake’s structure and taste perfect.
Temperature is key at every cake-making step. Each part of your dessert needs a certain temperature to stay top-notch:
- Cake layers: Best stored between 6°C – 8°C
- Frosting: Keep between 4°C – 7°C
- Fondant decorations: Ideal temperature range 14°C – 18°C
« Temperature is the silent artist in cake design » – Professional Pastry Chef
Here’s how to store your tiered dessert right:
- Refrigerate cakes with perishable frostings
- Use airtight containers to prevent moisture loss
- Avoid temperature fluctuations
| Cake Type | Storage Temperature | Maximum Storage Time |
|---|---|---|
| Buttercream Cake | 4°C – 7°C | 3-4 days |
| Fondant Cake | 6°C – 8°C | 2-3 days |
| Cream-based Cake | 2°C – 5°C | 1-2 days |
Pro tip: Always wrap your cake design carefully to prevent flavor absorption and maintain moisture. Keeping the right temperature ensures your cake stays fresh, looks great, and tastes amazing from start to finish.
Conclusion
Your journey in making a stunning 3 tier cake is more than baking. It’s an art that mixes skill with creativity. You’ve learned to turn a simple dessert into a memorable centerpiece for special days.
The world of wedding cake design is always changing. Couples are trying new things like using edible gold leaf or exotic fruit infusions. Your skills now go beyond just baking. A well-made 3 tier cake not only feeds your guests but also tells a special story through its design and flavors.
Creating a wedding cake is a personal journey. Your skills in building, decorating, and choosing flavors will help you make amazing desserts. With each cake, you’ll get better and more confident in your ability to create stunning culinary works.
Keep exploring new trends, techniques, and flavors as you continue your cake design journey. Your passion and creativity are key to making unforgettable wedding cakes. These cakes will be remembered for years to come.