Mastering the 8 inch cake size starts with the right tools and techniques. Whether you’re baking a vanilla cake or a rainbow layer cake, this guide ensures every slice turns out flawlessly. Discover how baking strips keep edges soft, layers flat, and textures consistent for bakery-style results at home.
Table of Contents
Understanding the 8 Inch Cake Size and Its Popularity
An 8-inch cake is just right, not too big, not too small. It’s perfect for all kinds of celebrations. Whether it’s a birthday or a potluck, this cake fits right in.
Why the 8 Inch Cake Is a Baker’s Favorite
Both pros and hobbyists love the 8-inch cake. It’s easy to make bigger or smaller. A single layer feeds 8-10 people, and a double layer serves 16-20.
It’s easy to store and fits most ovens. Flavors like vanilla and chocolate are especially good with this size.
Serving Capacity of an 8 Inch Cake
| Layer Configuration | Servings |
|---|---|
| Single layer (2-inch height) | 8-12 portions |
| Double layer (1-inch layers) | 16-24 portions |
| Mini portions (1.5″ slices) | Up to 30 samples |
Change the size of your slices with the cake’s dimensions. A 2″x2″ piece from an 8-inch round gives 12 servings. For bigger parties, try 1.5″x1.5″ slices for more servings without losing flavor.
Occasions Perfect for an 8 Inch Cake
- Baby showers or gender reveals
- Weekend brunches
- Corporate meetings (team snacks)
- Small weddings or rehearsal dinners
- Theme parties (e.g., dessert buffet tables)
Professional bakeries say 8-inch cakes are perfect for 20-24 guests. They’re great for personal touches like fondant designs or seasonal themes. Plus, they’re easy to take on the go, perfect for picnics or potlucks.
Essential Equipment for Baking Your Perfect Cake
Getting an 8-inch small cake right starts with the right tools. Using low-quality gear can mess up cake measurements, texture, and look. Here are the must-haves:
- Pans: Choose two 8-inch round pans like Fat Daddio’s Aluminum Bakeware or Wilton Nonstick Cake Pans. They should be 1.5–2 inches deep for even baking.
- Mixing Tools: A stainless steel bowl, handheld mixer, and silicone spatula help avoid spills and lumps.
- Measuring Tools: Use digital scales (e.g., OXO Good Grips) and liquid measuring cups for exact cake measurements.
- Cooling & Decorating: A wire rack cools layers evenly. An offset spatula is great for frosting.
| Tool | Key Feature | Price Range |
|---|---|---|
| 8-inch Cake Pans | Nonstick coating, oven-safe up to 450°F | $12–$30 |
| Digital Scale | 0.1g precision, auto-zero function | $20–$50 |
| Silicone Spatula | Heat-resistant, flexible blade | $5–$15 |
| Cooling Rack | Grid design, heat-resistant wire | $10–$25 |
Invest in oven-safe tools like Wilkinson Pro-Classic Cooling Racks for stability. For small cake projects, choose pans with straight sides to keep shape. Always check pan labels for exact dimensions to match your cake measurements. Good equipment means your layers will rise evenly and come out clean every time.
Selecting the Right 8 Inch Cake Pan
Choosing the right 8 inch cake pan is key. It’s about picking a pan that heats well and fits your recipe. Here’s what to look for:
Material Matters: Aluminum vs. Non-Stick vs. Glass
| Material | Pros | Cons |
|---|---|---|
| Aluminum | Even heat distribution, durable | May warp if overheated |
| Non-Stick | Slick surface for easy removal | Risk of peeling over time |
| Glass | Translucent for visual baking checks | Slower heat transfer |
Experts say Fat Daddio’s Anodized Aluminum is great for even browning. Wilton’s 8-In. Round Set is a good choice for those on a budget. But, glass pans are best used at lower temperatures.
Depth Considerations for Different Cake Styles
- 1-inch depth: Ideal for thin layers in multi-tier 8 inch cakes
- 2-inch depth: Perfect for standard home bakes like birthday cakes
- 3-inch depth: Professional-style height for rich carrot or pound cakes
Must-Have Features in Quality Cake Pans
Look for pans with straight vertical sides to prevent batter overflow. Make sure the bottom is exactly 8 inches wide. Some brands, like Nordic Ware, offer extra width for even baking.
Double-check the depth markings. Choose pans with rolled edges to keep batter in. Tests show Nordic Ware’s 8 5/8″ diameter is the best, even though it’s lighter than USA Pans.
Always line pans with parchment and fill no more than two-thirds full. Brands like Wilton and USA Pan are reliable. But, Nordic Ware’s 11-oz aluminum is still the top choice for consistent results.
Ingredients That Make the Difference in Your Cake
Choosing the right ingredients can turn your 8-inch cake into something special. Whether it’s a personalized cake or a custom cake size, small changes can make a big difference. Start by preparing your ingredients well to help your cake rise evenly and stay moist.
Room Temperature Ingredients
Make sure eggs, butter, and milk are at room temperature before mixing. Cold ingredients can make your batter uneven, leading to a dense cake. Let eggs sit out for 30 minutes and warm butter in the microwave for 10 seconds if you’re in a hurry.
This step is key for a smooth batter. It’s especially important for an 8-inch custom cake size that’s perfect for smaller gatherings.
Flour Types and Texture
| Type | Texture | Best Use |
|---|---|---|
| Cake Flour | Ultra-fine (30x finer than all-purpose) | Light, fluffy layers |
| All-Purpose Flour | Medium grind | Moisture retention in spice or fruit cakes |
Replace 2 tablespoons of all-purpose flour with 2 cups of cake flour for a bakery-quality texture.
Sweeteners and Flavor Enhancers
- Add 1 tsp vanilla extract and ½ tsp almond extract for depth
- Substitute ¼ cup milk for buttermilk to boost tanginess
- Stir in 2 tbsp sour cream for moisture retention
Customize your personalized cake with citrus zest or coffee in chocolate mixes. These changes let you match flavors to any event—birthday, anniversary, or themed parties.
Proper Cake Measurements for an 8 Inch Pan
Getting cake measurements right is key for an even 8-inch cake. An 8-inch round pan can hold about 4 cups of batter halfway. If it’s 2 inches deep, it can hold up to 6 cups. But, overfilling can cause air to get trapped, leading to cracks or collapse.
- Batter volume: For layered cakes, use 3–3.5 cups per pan. Two 8-inch pans need 6–7 cups total.
- Fill level: Fill batter to 1/2–2/3 full. Filling too much can cause spills or domed tops.
- Conversion guide: If a recipe is for a 9-inch pan, divide it for 3×8-inch pans to avoid overcrowding.
« Exact cake dimensions matter as much as ingredients. Precision turns amateur bakers into pros. » – The Kitchn Baking Guide
When adjusting recipes, remember the size of the pans. An 8-inch round has more than 50 square inches, while a 9-inch pan has 64. A 9×13-inch rectangle can hold 50% more than two 8-inch pans. The rule is: smaller pans need more layers.
Scale ingredients by volume ratio. For example, 7 cups of batter in three 8-inch pans makes taller layers than two 9-inch pans. Always grease pans evenly to prevent batter imbalance.
- Tools tip: Use a kitchen scale for accuracy—dry ingredients like flour (310g) and sugar (250g) vary by cup packing.
- Check depth: 1½-inch-deep pans bake faster than 2-inch-deep ones. Adjust oven time by 5–10 minutes for thicker layers.
Mastering Batter Preparation Techniques
Perfect batter is key for any small cake. Follow these steps for even rise and moistness. The cake size guide begins here.
The Creaming Method Explained
Cream butter and sugar until light and fluffy—3–5 minutes with an electric mixer. Use room-temperature butter for best results. This step traps air bubbles critical for lift. Overmixing here leads to dense layers, so stop when the mixture turns pale and creamy.
Folding in Ingredients for Maximum Fluff
Add dry ingredients using a gentle folding motion with a spatula. Overmixing collapses air bubbles, so work quickly but gently. Use a Wilton Offset Spatula to lift and fold, ensuring dry ingredients blend without deflating. This step is vital for small cake textures where errors show easily.
Achieving the Ideal Batter Consistency
Perfect batter should be thick but smooth, like wet sand. Check consistency by spreading a spoonful on a plate—no streaks should remain. Troubleshooting tips:
- Too runny? Add 1 tbsp flour.
- Too thick? Mix in 1 tsp milk.
- Curdling? Stir gently with a silicone spatula to reincorporate.
Use a digital scale to measure ingredients by weight for accuracy. Proper batter prep ensures your 8-inch cake bakes evenly, whether making a birthday treat or a wedding cake sample.
Oven Settings and Baking Time for 8 Inch Cakes
Getting your 8 inch cake just right begins with the right oven settings. Heat it up to 350°F (177°C) for most butter cakes. But, if you’re making sponge cakes, you might need to go up to 375°F. And if your pans are dark, you can lower the heat by 25°F.
Always place your cake in the oven’s center rack. This ensures it cooks evenly.
- Preheat oven 15 minutes before baking
- Avoid opening the door until minimum baking time is reached
- Use an oven thermometer for accuracy
| Type | Temperature | Time | Notes |
|---|---|---|---|
| Butter Cake | 350°F | 24–25 min | Clean toothpick = done |
| Sponge Cake | 375°F | 20–22 min | Watch edges for browning |
| Chocolate Cake | 325°F | 28–30 min | Rotate pans halfway |
To check if your cake is done, gently press the center. It should spring back. For a cake size guide, fill pans only two-thirds full. Remember, overbaking can make your cake dry. Start checking after 22 minutes.
Let your cakes cool for 10 minutes in the pans before moving them to a rack.
Testing for Doneness: Beyond the Toothpick Method
To make sure your 8-inch cake is just right, you need more than a toothpick test. Knowing your cake measurements and how your cake size behaves is crucial. This helps avoid dryness or sinking. Here are three expert methods to master.
Visual Cues Your Cake Is Perfectly Baked
- Edges pull away from the pan’s sides slightly
- Surface has a light golden-brown hue—not too dark
- Center stops jiggling and shows slight doming
Temperature Testing for Professional Results
Check the cake’s internal temperature with an instant-read thermometer. Most butter cakes are ready at 200–205°F (93–96°C). For unshortened cakes, a lightly browned surface that springs back when pressed is a sign of readiness.
The Gentle Press Test Technique
Gently press the cake’s center with a fingertip. If it springs back right away, it’s done. Overdone cakes feel firm and hard. Underbaked ones will sink or feel soft.
Pro tip: Start checking at the minimum bake time to avoid overcooking. Use these methods with oven thermometer calibration to match your 8-inch pan’s heat.
Cooling and Removing Your Cake Without Breakage
After baking your small cake, cooling it right is crucial to prevent cracks or crumbling. First, let the cake rest in the pan on a wire rack for 10-15 minutes. This helps the structure firm up before you handle it. Then, use a knife to gently loosen the edges.

Once it’s cool enough, flip the pan onto a rack. Wait 1-2 hours for it to cool completely. This is especially important for personalized cake designs, as it keeps layers together for perfect decorations. Use parchment paper to line pans to prevent sticking, especially with delicate sponge or boxed mixes.
- Place pans on a cooling rack to promote airflow around all sides.
- Freeze layers 20-30 minutes before frosting to firm edges and prevent sogginess.
- Use a cake leveler or serrated knife to trim domed tops evenly.
- Wrap cooled cakes in parchment and plastic wrap if storing overnight before decorating.
Not cooling the cake can make frosting melt or designs crack. Boxed mixes are especially delicate. For detailed personalized cake designs, a fully cooled base is key for stability under fondant or intricate piping. If the cake sticks, use a spatula to gently pry it loose—never force it. Always let buttercream set for 24 hours if adding delicate decorations like edible flowers or detailed borders. Proper cooling turns a fragile cake into a solid base for your creative work.
Leveling and Layering Techniques for Multi-Tier 8 Inch Cakes
Turn your 8-inch cake into a stunning multi-tier masterpiece. Start by leveling each layer for stability and even frosting. This method prevents uneven tiers, even for custom sizes.
Tools That Make Leveling Foolproof
- Use a serrated knife or cake leveler to slice domed tops smoothly.
- A cake turntable keeps layers centered while cutting.
- Rulers or guides ensure consistent thickness across all slices.
Creating Even Layers Without Waste
Begin by torting (horizontally slicing) each layer to double your tiers. For example, a single 2-inch-thick layer becomes two 1-inch layers. This boosts height without extra batter. Always measure with a ruler to maintain uniformity. This method minimizes waste while maximizing vertical potential for any cake size.
Proper Stack and Support Methods
When assembling, apply 3/4 to 1 cup frosting between layers to act as both glue and cushion. For towers over 5 inches tall, insert dowels made of wood or plastic to prevent collapse. Always crumb coat first, chilling for 20-60 minutes to lock crumbs before final frosting. An 8-inch cake’s standard 4-6 inch height allows creative stacking without excessive structural support.
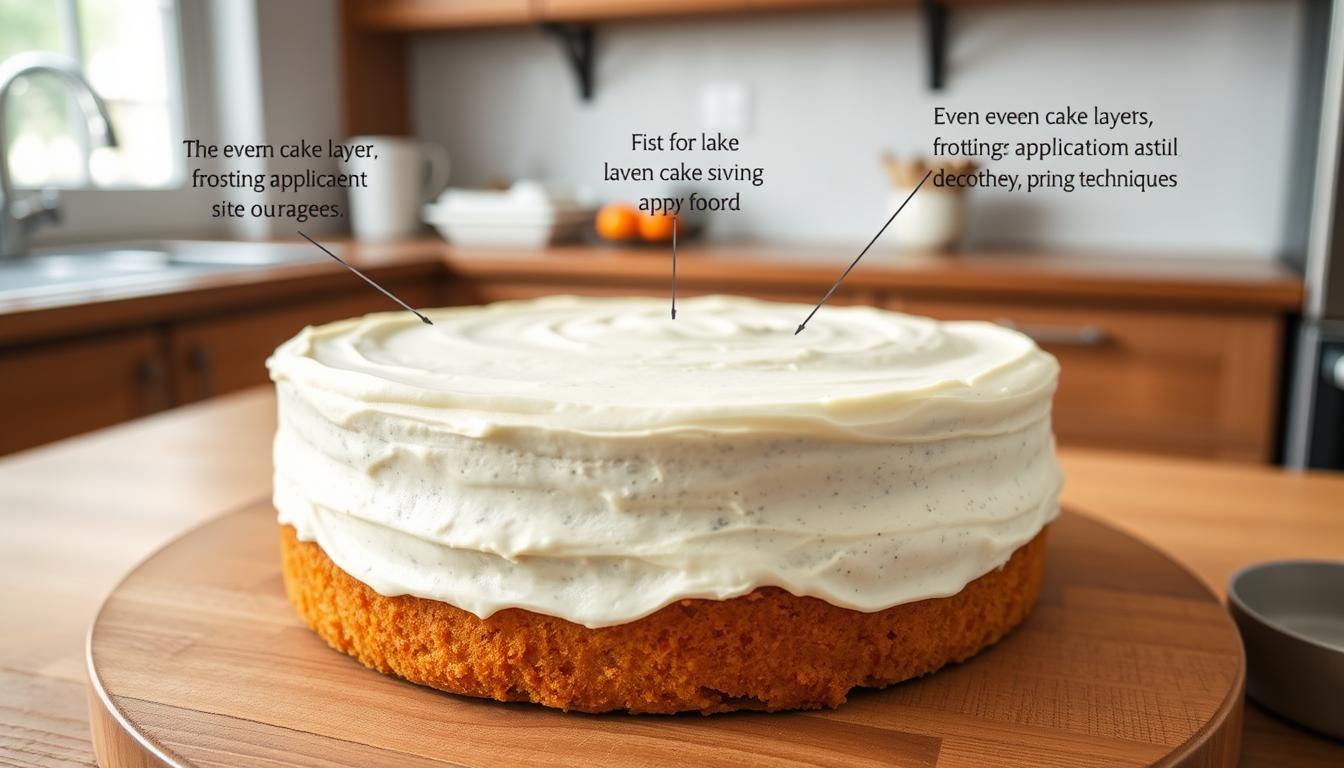
Frosting Options That Complement Your Cake Dimensions
Choosing the right frosting for your 8 inch cake is key to its look and taste. Match the frosting’s texture to your design. For personalized cake designs, choose frostings that hold details well.
- American Buttercream: A classic choice, this frosting’s stiffness is perfect for intricate piping. Use 2–3 cups for a full 8-inch layer cake.
- Cream Cheese Frosting: Mix 1 ½ cups of this tangy spread for a balanced flavor. It pairs well with carrot or red velvet flavors.
- Swiss Meringue: This glossy option works best for smooth finishes. Use 1 ¼ cups to coat an 8-inch cake without overpowering the batter taste.
Pro tip: For personalized cake text or floral designs, double the buttercream recipe. Use an extra ½ cup powdered sugar for stiffer peaks. When layering, apply a ¼-inch crumb coat first to lock in crumbs.
Heat-sensitive frostings like ganache shine in warm climates. Chocolate ganache requires a 2:1 ratio of cream to chocolate, poured over the cooled cake for a glossy sheen. For minimalist designs, a thin layer of Swiss meringue paired with fresh fruit toppings saves on frosting volume while maximizing elegance.
Storage matters: Buttercream-topped cakes last up to 3 days at room temperature. Fondant-covered cakes stay fresh longer but require precise application tools like offset spatulas. Always test small swatches of frosting on the side of your pan before full coverage.
Decorating Ideas Specifically for 8 Inch Cake Dimensions
Turn your 8-inch cake into a masterpiece with these decorating tips. The right methods make every detail pop without cluttering the design.

Piping Techniques Scaled for This Size
For borders, use piping tips like #12. For rosettes, go with #16. Make sure written messages are at least 0.5 inches tall for clarity. Opt for fresh berries or chopped nuts for a healthier, yet stylish, topping.
Fondant Coverage Tips and Measurements
Cut fondant circles to 13-14 inches in diameter. Roll it to 1/8-inch thickness for a flawless finish. Too much fondant can make smaller cakes look saggy. A trick: dust your rolling pin with powdered sugar to prevent sticking.
Creating Personalized Designs for Special Occasions
Turn your cake into a personalized cake with these ideas:
- Miniature characters or logos for kids’ birthdays
- Monograms or floral patterns for weddings
- Geometric patterns for corporate events
| Occasion | Slice Size | Servings |
|---|---|---|
| Party | 1.5 inches wide | 18-20 slices |
| Wedding | 1 inch wide | 25-28 slices |
| Family Gathering | 2 inches wide | 12 slices |
An 8-inch cake’s small size lets you add detailed designs without using too much material. Test your designs on parchment paper before applying them to the cake. This helps perfect your patterns.
Troubleshooting Common Issues with 8 Inch Cakes
Even with careful preparation, 8 inch cakes can face unexpected problems. Minor adjustments to cake measurements or technique often fix these issues. Let’s address the most frequent challenges and how to solve them:
- Sinking Centers: Opening the oven door during rising disrupts heat flow. Keep the door closed until the timer ends. Check cake measurements ensure batter fills the pan correctly.
- Cracked Tops: Overly hot ovens cause rapid surface baking. Reduce heat by 15°C or use baking strips to slow edge cooking.
- Uneven Baking: Verify pan size matches your recipe. An 8-inch pan requires precise measurements—adjust baking time if using a different size.
- Wet Centers: Underbaked cakes may need 5-10 extra minutes. Test with a toothpick inserted into the center.
“A properly calibrated oven is your best tool. Use a thermometer to confirm accuracy before baking.”
Overmixing batter creates dense results. Stop mixing once dry ingredients are just incorporated. For domed tops, cool cakes fully before frosting to avoid structural collapse. Always measure flour by spooning and leveling—not scooping—to prevent excess flour absorption.
If your cake collapses after removing from the oven, it might lack structural support. Add 2 1/4 tsp baking powder for proper leavening. For rubbery texture, reduce mixing time by 30 seconds.
Remember: Precision in cake measurements and pan selection ensures consistent results. Adjust oven racks to center position and avoid drafty areas. With these fixes, even tricky 8 inch cakes can turn out perfect every time.
Storage Solutions to Maintain Freshness
Follow this cake size guide to keep your small cake fresh. The 8-inch size fits easily in most kitchen spaces, making storage simple. Always let cakes cool completely before sealing to avoid moisture buildup.
Refrigeration Best Practices
Keep frosted or perishable-filled cakes fresh for 5 days using these steps:
- Wrap layers in plastic wrap, then aluminum foil to lock in moisture.
- Use a small cake carrier or airtight containers like Rubbermaid Brilliance or Stasher bags.
- Store in the fridge’s middle shelf to avoid temperature fluctuations.
Freezing for Long-Term Storage
Freeze unfrosted layers or fully assembled cakes for up to 2 months:
- Wrap layers tightly in plastic wrap, then foil before freezing.
- Use Stasher silicone bags for frostings; thaw overnight in the fridge.
- Freeze individual slices for grab-and-go treats.
Room Temperature Storage
Unfrosted cakes stay fresh at room temp for 2-3 days:
- Use a Pyrex domed container or cake keeper to block air flow.
- Place in a cool, dark cupboard away from direct light.
- For layered cakes, separate with parchment paper in a Snapware stackable container.
Small cakes like the 8-inch format fit neatly in tight spaces. Check container seals regularly to prevent odors from absorbing into the small cake. Always test for freshness by smelling before serving.
Conclusion
An 8 inch cake is ideal for both practicality and presentation. It’s perfect for bakers of all levels. This guide has shown how to get consistent results, from choosing the right pan to frosting.
This cake size is great for small gatherings or family events. It serves 8-12 people with little waste.
Professional bakeries might charge $52 for a 2-layer vanilla cake. But, with our tips, you can make a similar cake at home. Remember, giving a 48-hour notice ensures your cake is fresh. You can also find gluten-free or vegan recipes that customers love.
For cake toppers, choose sizes between 3-4 inches. This keeps the design balanced. Always measure your cake before decorating.
Use light materials like fondant for stability. For detailed designs, smaller toppers work best. If you need custom designs, call 973-957-0500. This guide will help you make every 8 inch cake a success.
By following these tips, your cakes will be as good as those from a bakery. Keep this guide handy to improve your baking skills. It’s perfect for birthdays or holidays, offering creative and tasty options for any celebration.